

One great advantage of having access to coding agents such as Claude Code or Codex is that you can create internal applications super quickly.
Well, before coding agents, you had to spend weeks, if not months, to create internal tooling that was effective for you. You can now do it in a matter of minutes. This has greatly changed the domain of internal tooling. Before coding agents, you would typically look to purchase such tooling, and you would always have to consider whether this is really worth it, how much time you’re really saving with this tooling compared to how much you’re paying for it, and so on.
The great thing now is that you can spin up this tooling so incredibly quickly that you don’t really have to make the consideration. If you believe such internal tooling can help you become a bit more efficient or help you in any other way, you should probably start creating the application.
I saw the need for internal tooling where I hand in a meeting recording audio, and it outputs the person speaking in each sentence. Normally, when you give audio to a meeting transcription tool, it gives you something like what you see below, where it identifies each individual speaker in the recording and labels them as speaker 1, speaker 2, speaker 3, and so on. This is, of course, very good because it helps you identify which individual is saying which sentences throughout the recording. However, what you really want is to have the name of who says what in the meeting: not only anonymous speaker labels, but actually named speaker labels.
Above, you see an example of anonymous speaker labels, but what you would actually want is something like:
This is the application I built for myself in just a matter of two hours. And in this article, I’ll discuss why I came up with the idea and how I implemented it.
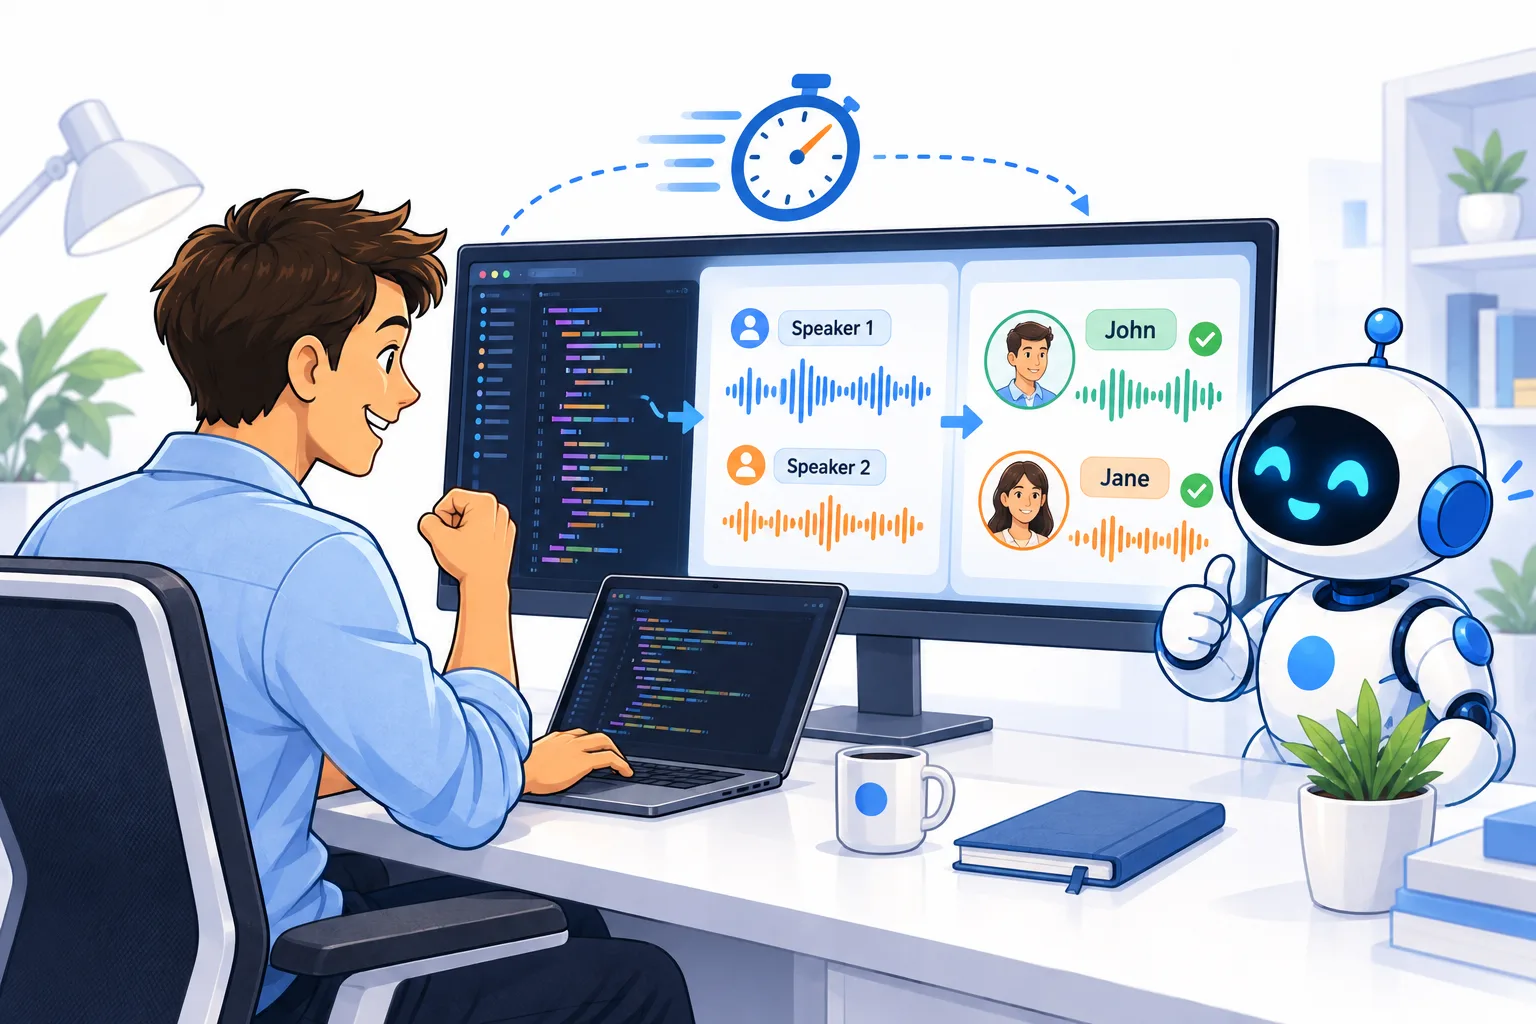
This infographic highlights the main contents of this article. I’ll discuss why I needed the speaker recognition app, how we can build internal tooling with Claude Code in general, and how the details of how the speaker recognition app works. Image by ChatGPT.
Why I need speaker labels
I like to record internal meetings that we have and store them for later so that I can easily look up previous discussions that we’ve had in the company.
However, I found that the typical transcription tool that I was using, Soniox, only labeled anonymous speakers. It makes sense, because if I only input single recordings every time, it’s impossible, of course, for the API to know who is who in the recording.
I then started to look online if anyone is actually offering this service where you have audio samples of each individual person and it can name the individuals in each meeting. But I couldn’t find any good, robust tooling online, and I decided to start making it myself. This is also advantageous because I control the application; I can customize it to my exact needs, and I am sure the data is handled appropriately.
If this were 2019 and I didn’t have access to coding agents, I would probably not be making this application because it would likely take me around two days to implement this in a solid manner, if it would be possible at all, given the audio transcription models at the time.
Now, however, this can be done in just a few hours. And it’s highly accurate because of how good the audio models are nowadays. Thanks to coding agents, you can implement it very quickly and have it accessible on your device. It’s also possible to run this fully on a device with open-source transcription models, which are very good. For example, on a day-to-day basis, I use a tool called FluidVoice to transcribe what I say to my computer so I don’t have to type, which is a lot faster, and to interact with coding agents.
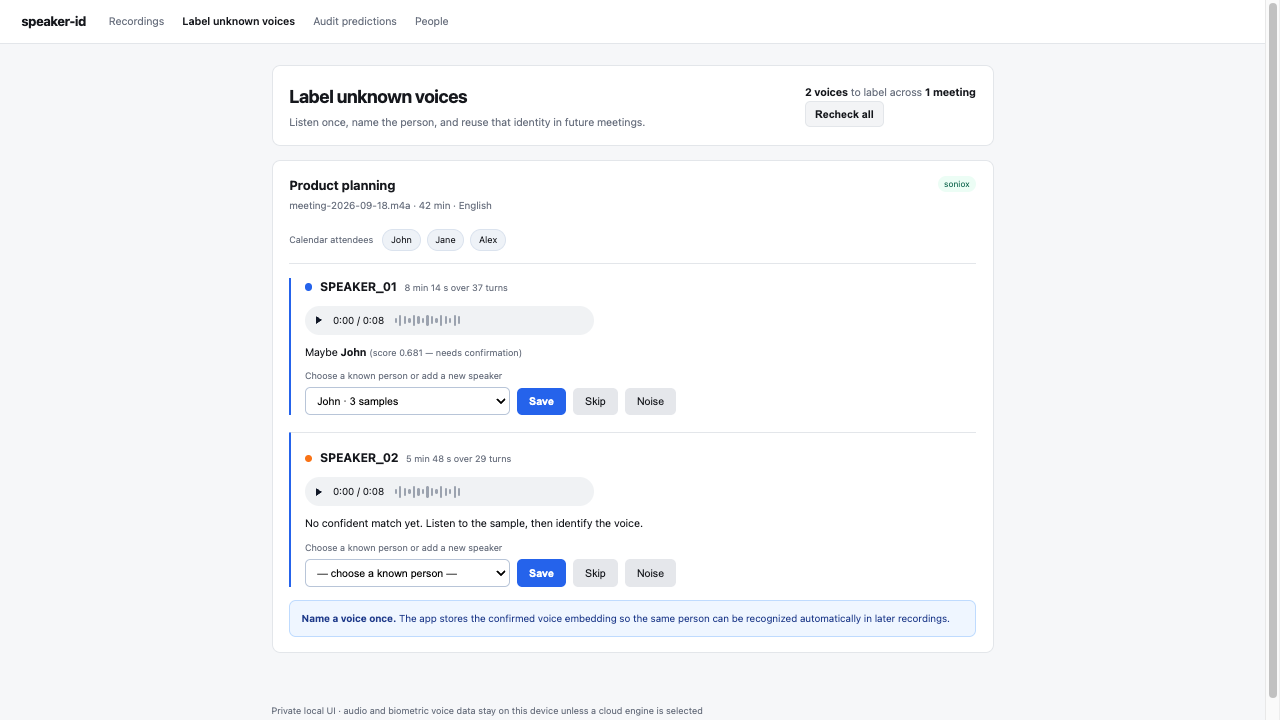
This image highlights what the application looks like where I can label different speakers and it automatically applies that label to all other meeting recordings that I have. So I only have to label each individual once. Image by authpr
How to build a speaker recognition app
Now, let’s move into how I built the app. I had an idea in my mind of what the app would look like and how it would work. When building an app quickly, like an internal tool using coding agents, it’s all about trying to share your vision of what the app will look like in as detailed a manner as possible in one single prompt. This requires you to think through the entire application and the different decisions you should make — for example, which transcription model to use, how to label each speaker, and so on — and you should try to inform the model beforehand, so it doesn’t have to ask you those questions. When you inform the agent of those decisions you’re as aligned as possible with it.
So this is what I did, and the approximate prompt I use to start creating the application was:
Now, this is quite an extensive prompt, which I urge you to do too when implementing new features like this. I try to cover as much as possible in the prompt so that I don’t have to go through multiple rounds with the model. The model knows, for the most part, what to implement right away. Now, I did have to preface some things to the model after it was implementing: for example, how I wanted the design to look when I label the speakers, which is, in hindsight, something I could have described to the model even more clearly. But it’s easy to remember such things in hindsight when the model tells you, or when you disagree with something the model implemented. It’s much harder to discover those things before the model starts implementing.
By now I have labeled quite a few speakers, and whenever I upload a new meeting recording, if all of the speakers have been labeled before, it automatically recognizes everyone in the recording so I don’t have to label anyone. If it’s a new person speaking, the app would tell me, “Hey, this is a new person. You need to tell me who it is.” I would then label them, and the model would know for all future recordings as well.
How the application works
Next, I’ll go into how the application works and dive into a bit more detail about how it recognizes the speakers, stores them, and so on. First, I use Soniox to get the anonymous speaker transcripts. This is just because it worked better than the local model in my experience. After I have the anonymous recording, I just fully trust that it’s completely correct because, in most cases it is, and what I then do is have the model find the timestamps of each unique speaker in order to get one recording of each unique speaker in that transcription. This is done because when Soniox gives you the transcription, it also gives you the start and end times of each sentence each person says, so I can easily grab audio samples of unique individuals.
Once I have this audio sample, I compare it against the list of audio samples we have from before. This is done by embedding the audio, just like you would embed a series of words in the text and compare using cosine similarity. If the confidence is high — over 80% — we automatically label the speaker, because it’s very likely that this is a speaker we’ve seen before. If the confidence is lower, I just give the audio sample to the user or tackle it myself, so I can label it and then store that audio sample for later. It is then embedded so that we can easily compare it against future embedded audio recordings.
This is just a high-level overview of how it works. It is just using embeddings to quickly compare the audio of someone and to figure out if we know the speaker from beforehand or not.
Conclusion
In this article, I discussed internal tooling and how you can build it to save time. In the pre-LLM era, you would have to spend a lot of time actually developing such internal tooling, but now it’s become so cheap to build it that, in many cases, it’s worth it just for a small productivity boost, like in the case of this app. It’s useful to me because it allows me to search previous meetings with higher accuracy.
I then discussed why I needed the speaker labels and how I built the app, showing you the initial prompt I had with the agent and discussing some follow-up prompts I had to use with the agent to make sure it implemented exactly the product that I wanted to implement. I then gave some details on how the application works by comparing speakers that we already know using embeddings of the audio. If similarity is high, it’s very likely that we already know the speaker. If the similarity is lower, then we would have to have a human label that speaker and store that in the database of known speakers so that we would likely not have to label them in the future. It’s worth knowing that the same person can sound quite different from situation to situation. For example, based on whether they are talking into their computer microphone or a headset microphone, whether they are out walking, and whether there’s a lot of noise in the background, which could disturb the known speaker library that you create using this application.
👉 My free eBook and Webinar:
🚀 10x Your Engineering with LLMs (Free 3-Day Email Course)
📚 Get my free Vision Language Models ebook
💻 My webinar on Vision Language Models
👉 Find me on socials:
💌 Substack